PROPAGATION

[These notes are based on a talk on 'Propagation from Cuttings' given for the Grampian & Tayside Group of
 , in May 2010.]
PROPAGATION
[These notes are based on a talk on 'Propagation from Cuttings' given for the Grampian & Tayside Group of
, in May 2010.]
Why propagate plants?
There are several reasons
The least admirable is to obtain several plants for 'nothing', (I often divide or take cuttings from newly bought plants before they're even in the ground).
For the pleasure in seeing cuttings root and thrive.
More pertinent to Plant Heritage is to maintain and increase stocks of your rare or endangered plants.
Plant Breeders Rights, PBR
Many plants bought today are subject to PBR. This means that the plant may not be propagated for sale for a period of time, usually 25 years, without the payment of a fee to the Rights holder.
There are mixed feelings over this. I think it is quite correct that a plant breeder who spends a great deal of time and money in breeding cultivars should have the results of this work protected. I'm not too sure that the same degree of protection should be given to someone who merely discovers a new form in their garden. However, the system does result in serendipitous discoveries of garden-worthy plants being made generally available.
I'd also draw your attention to the recent dispute concerning Geranium 'Jolly Bee' and G. 'Rozanne' (Gerwat) which raises questions concerning the criteria used when granting these rights.
PBR covers all forms of propagation including division but division is often necessary for the welfare of the plant!
However, despite what it says on some labels, PBR doesn't cover "acts done privately and for non-commercial purposes", so it's OK to propagate as long as you don't sell the results. See Michael Wickenden's article for a full discussion of the situation.
Cuttings
I'm dealing only with cuttings as this is the area in which I've most experience. Whilst I propagate Rowans mostly from seed, virtually everything else is via cuttings.
I was encouraged to try grafting Rowans by a quotation from Prof. Dutton to the effect that, ".. any fool can bud-graft Rowan.."[1] Not me!
I'm obviously not a professional and, whilst I now use a mister[2] unit, I'm going to refer only to the processes I used before this: processes which are available to anyone.
In order to grow, any plant, seed or cutting needs air, moisture, food and light. A cutting is a piece of botanic tissue which is trying to stay alive. To do this it must develop roots for the uptake of air and moisture and your job is to keep it alive until it has done this.
Basically, you need to meet its needs for moisture; the food it will use is within the cut material. This means that you have to limit water loss by,
The exception to this is with hard-wood cuttings which shouldn't be left with any leaves. At the same time, the compost can't be allowed to become too wet as water-logging reduces the uptake of oxygen by any roots that do form and will encourage molds.
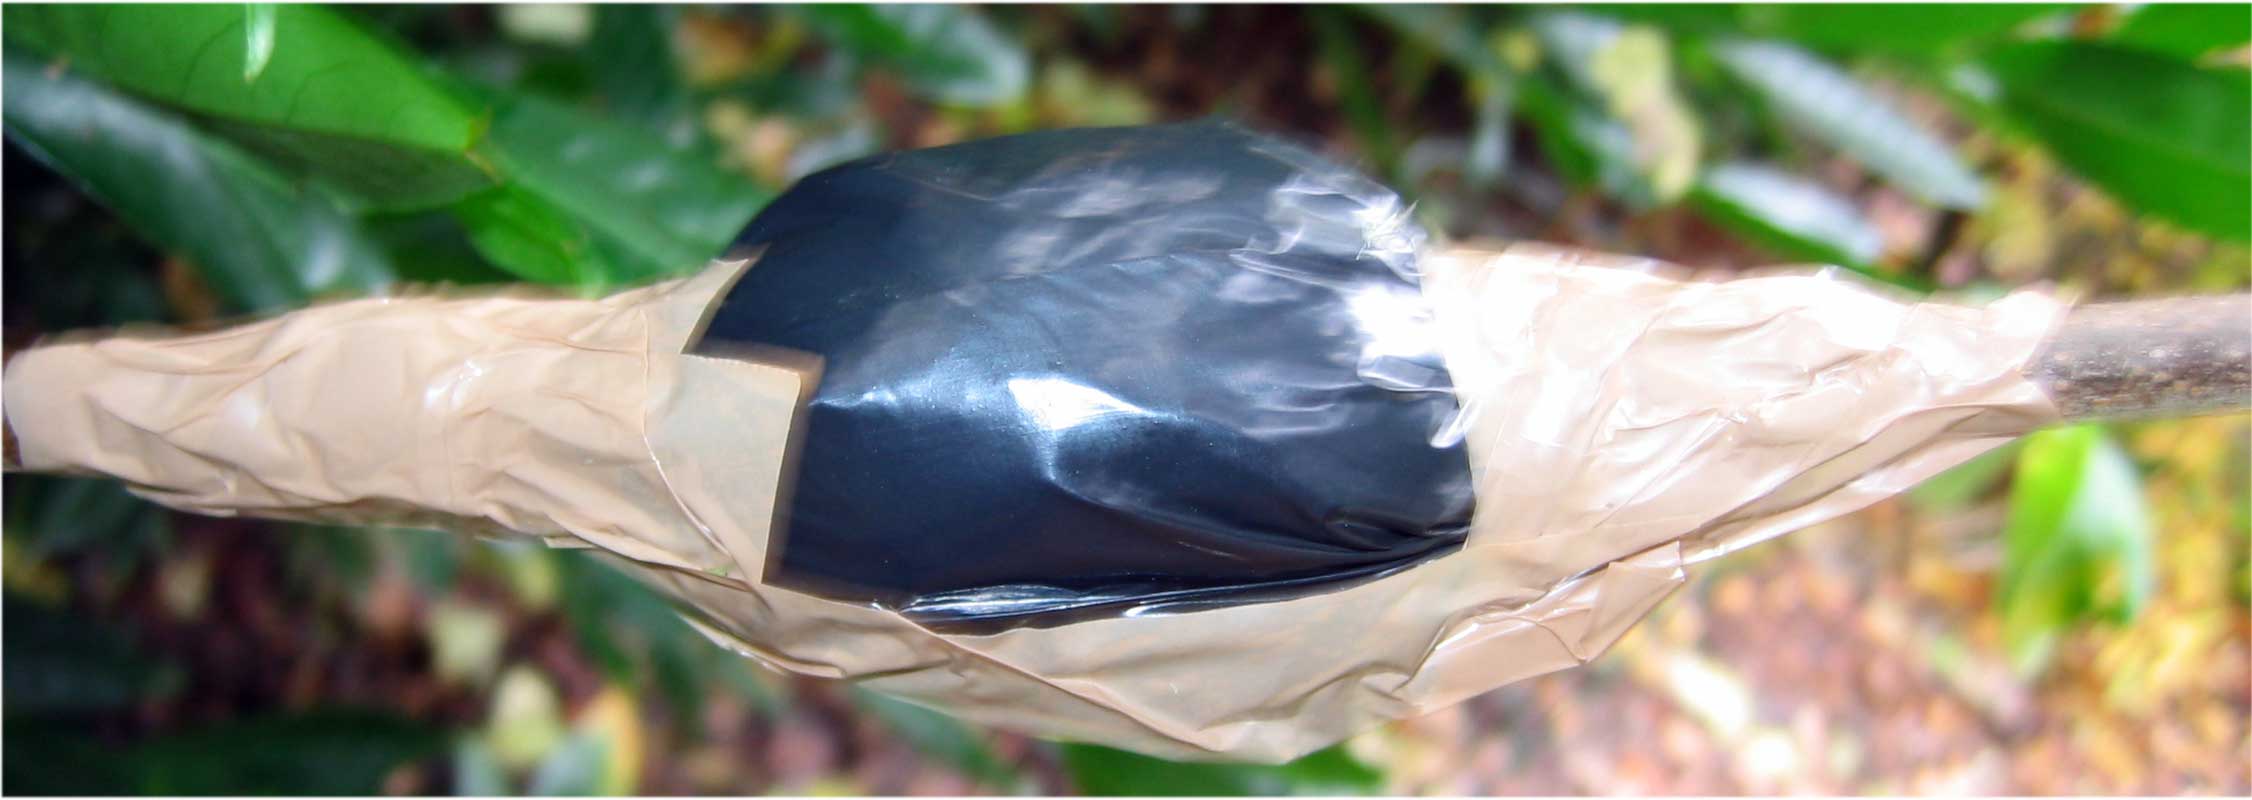
This involves placing the cuttings in a container of compost which is covered with a plastic bag.
I used both of the arrangements at the right with much success for several years before I made my mister unit.
The unit at the left consists of a seed tray fitted with two hoops of fencing wire to support a large clear plastic bag.
The one at the right is a flower pot with a cane in the centre supporting the bag which is tucked underneath to preserve moisture.
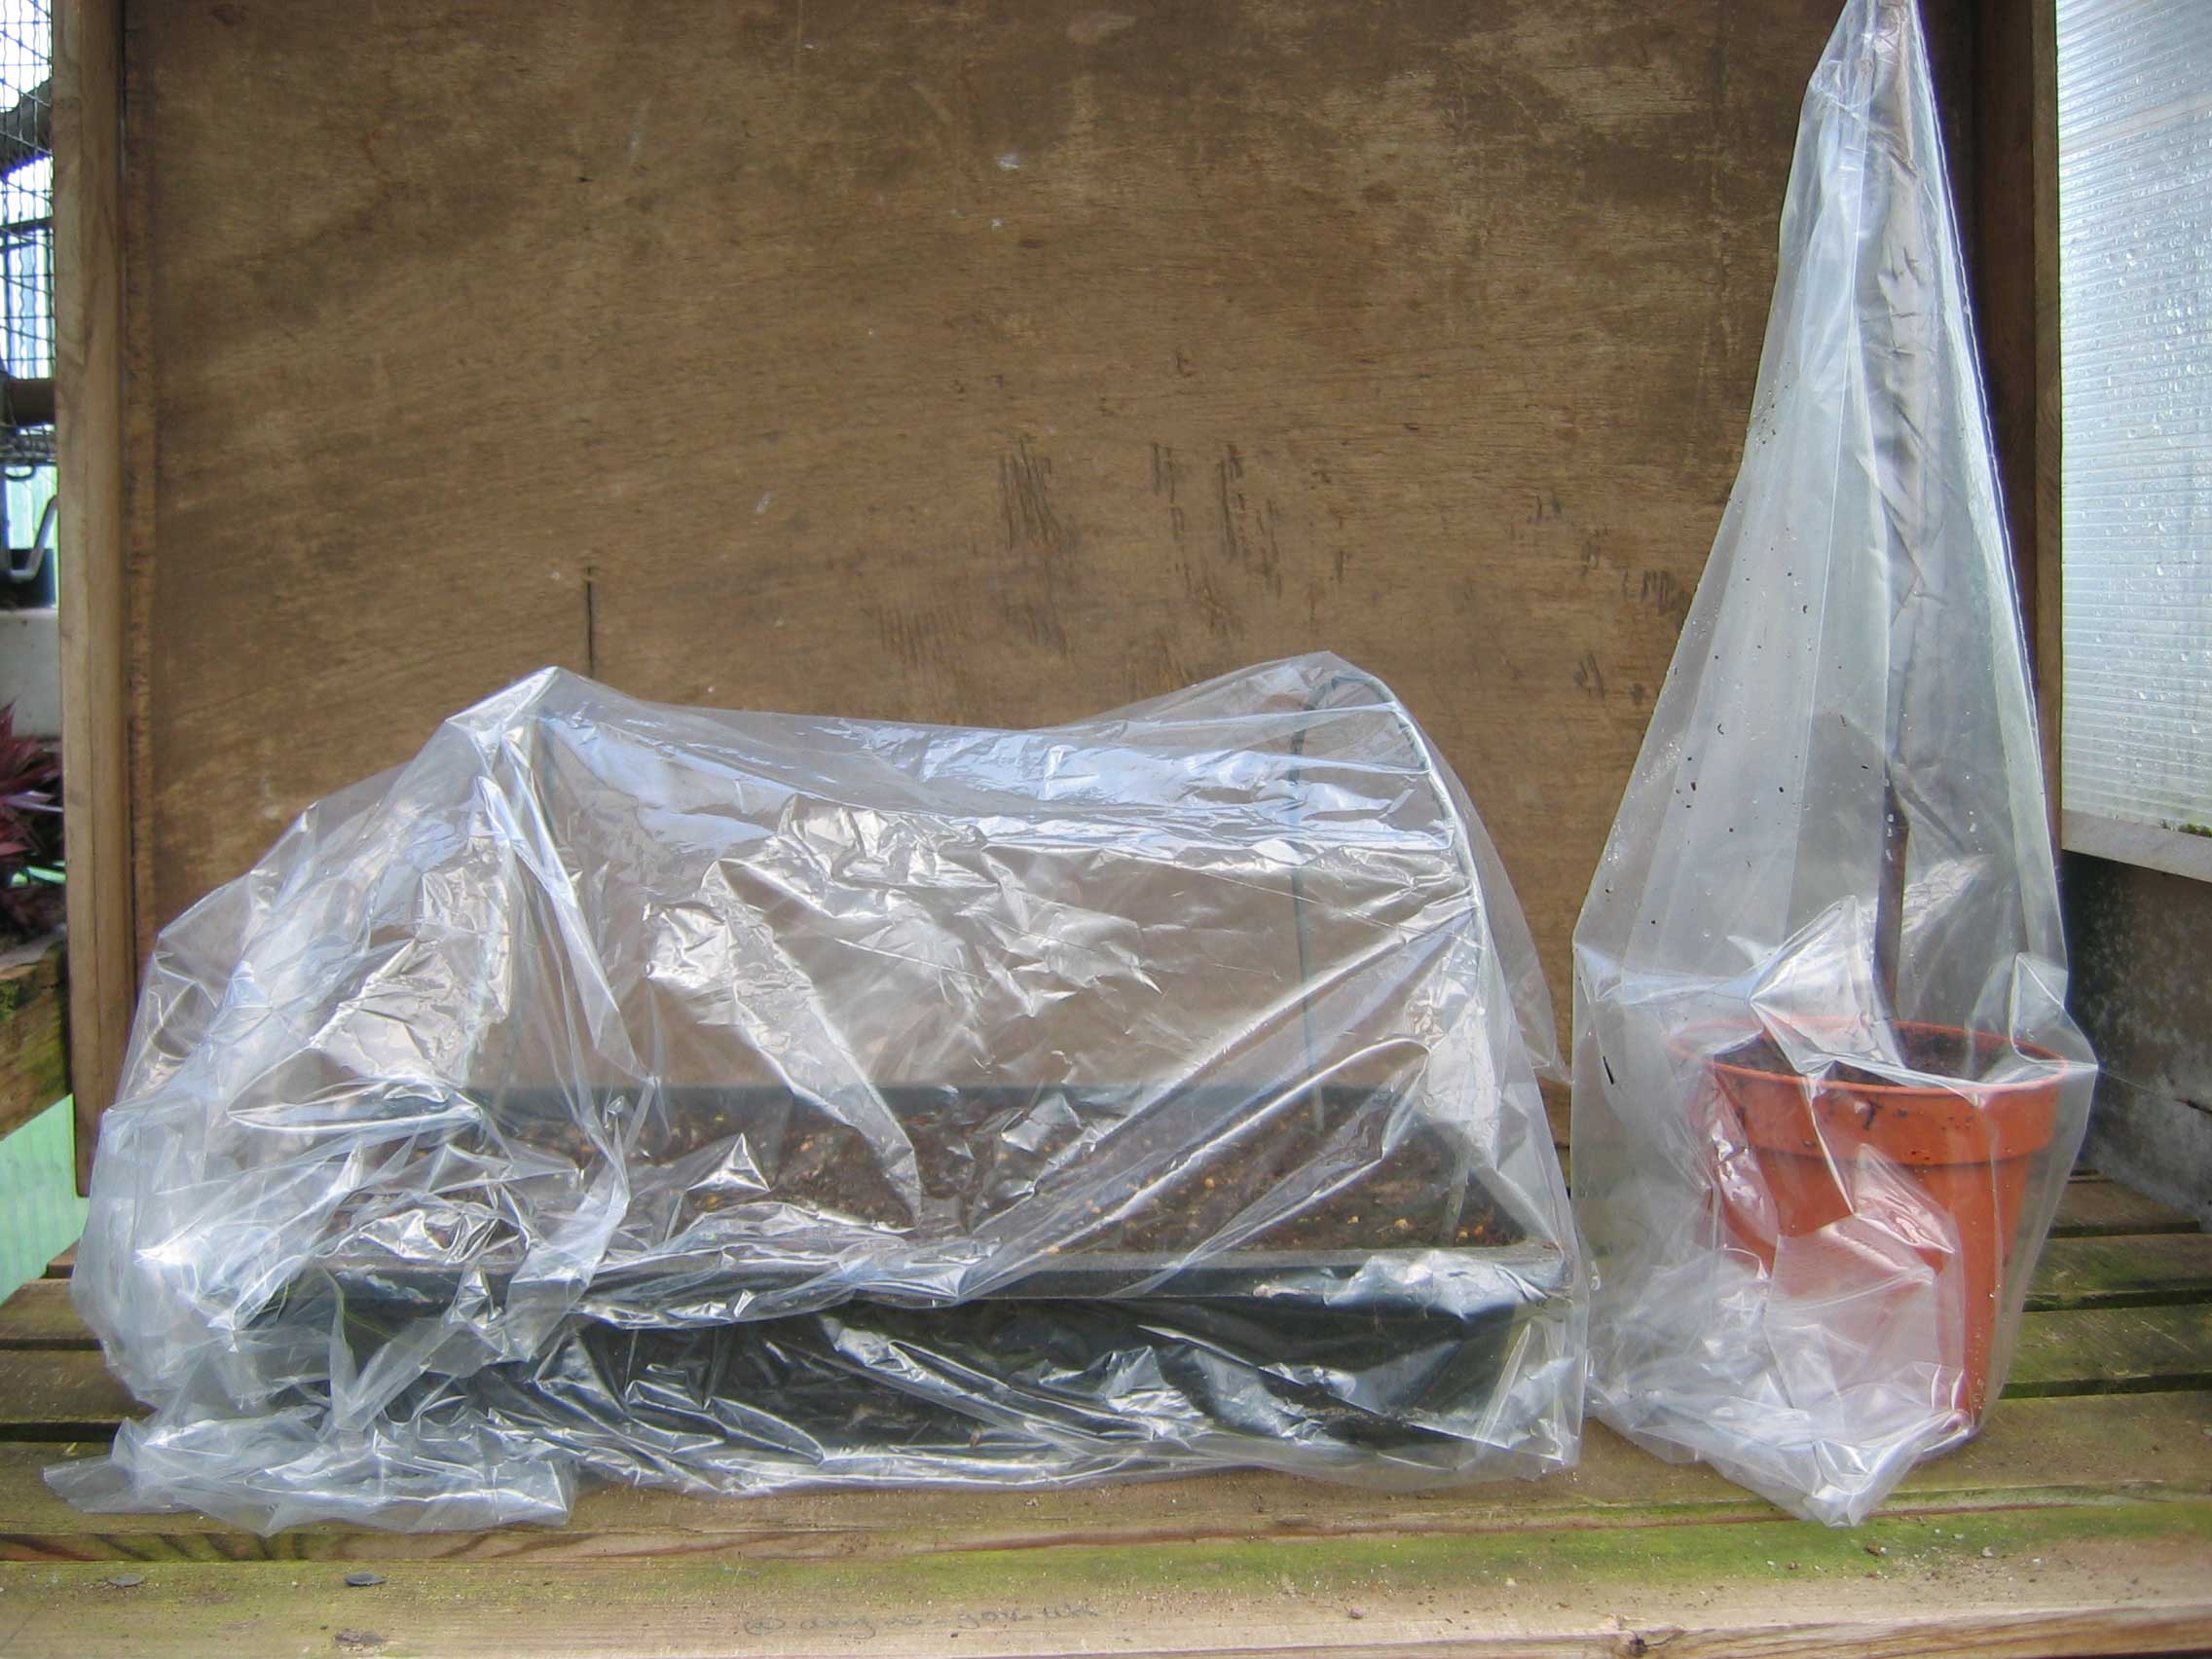
Click the image for a larger version
Hormone Rooting Powder, HRP
There are strongly contrasting views on HRP. Many people consider its use to be a waste of money. Others, usually commercial propagators, recommend its use.
My own view is that I've never seen any clear advantage in its use, (i.e. a trial with a set of cuttings half with, half without HRP, showed little difference).
Another problem is with its shelf-life. I've found one reference which states that it's about 8 months but another states. "it has practically no shelf life, it's probably already past it's best when you buy it and pretty well useless soon after you first open it."[3]
The problem lies with the processes which need to take place for root formation. With the exception of some Poplar species and most species of Willow, plants don't have root cells in their bark. When a cutting is taken a callus needs to form over the cut area which will contain stem cells which can change into root cells under the action of auxins tranmitted from the apex of the cutting to the cut end: hence the time needed for rooting. This time can be reduced, (not removed), by the use of HRP. However, if the synthetic hormone is not present at the correct concentration, it is liable to inhibit root formation! In other words, the use of HRP may reduce rooting times but it usually won't increase your strike rate. The exception to this is when a cutting takes so long to root that it is liable to die first.
N.B. some references recommend leaving cuttings for 24 - 48 hours for the callus to develop. This isn't a good idea for anything other than succulent cuttings as, in this time, the cutting will loose too much water. The callus will develop when the cutting is in the compost.
A detailed description of the processes involved can be found at Hydroponics Gardening Information.
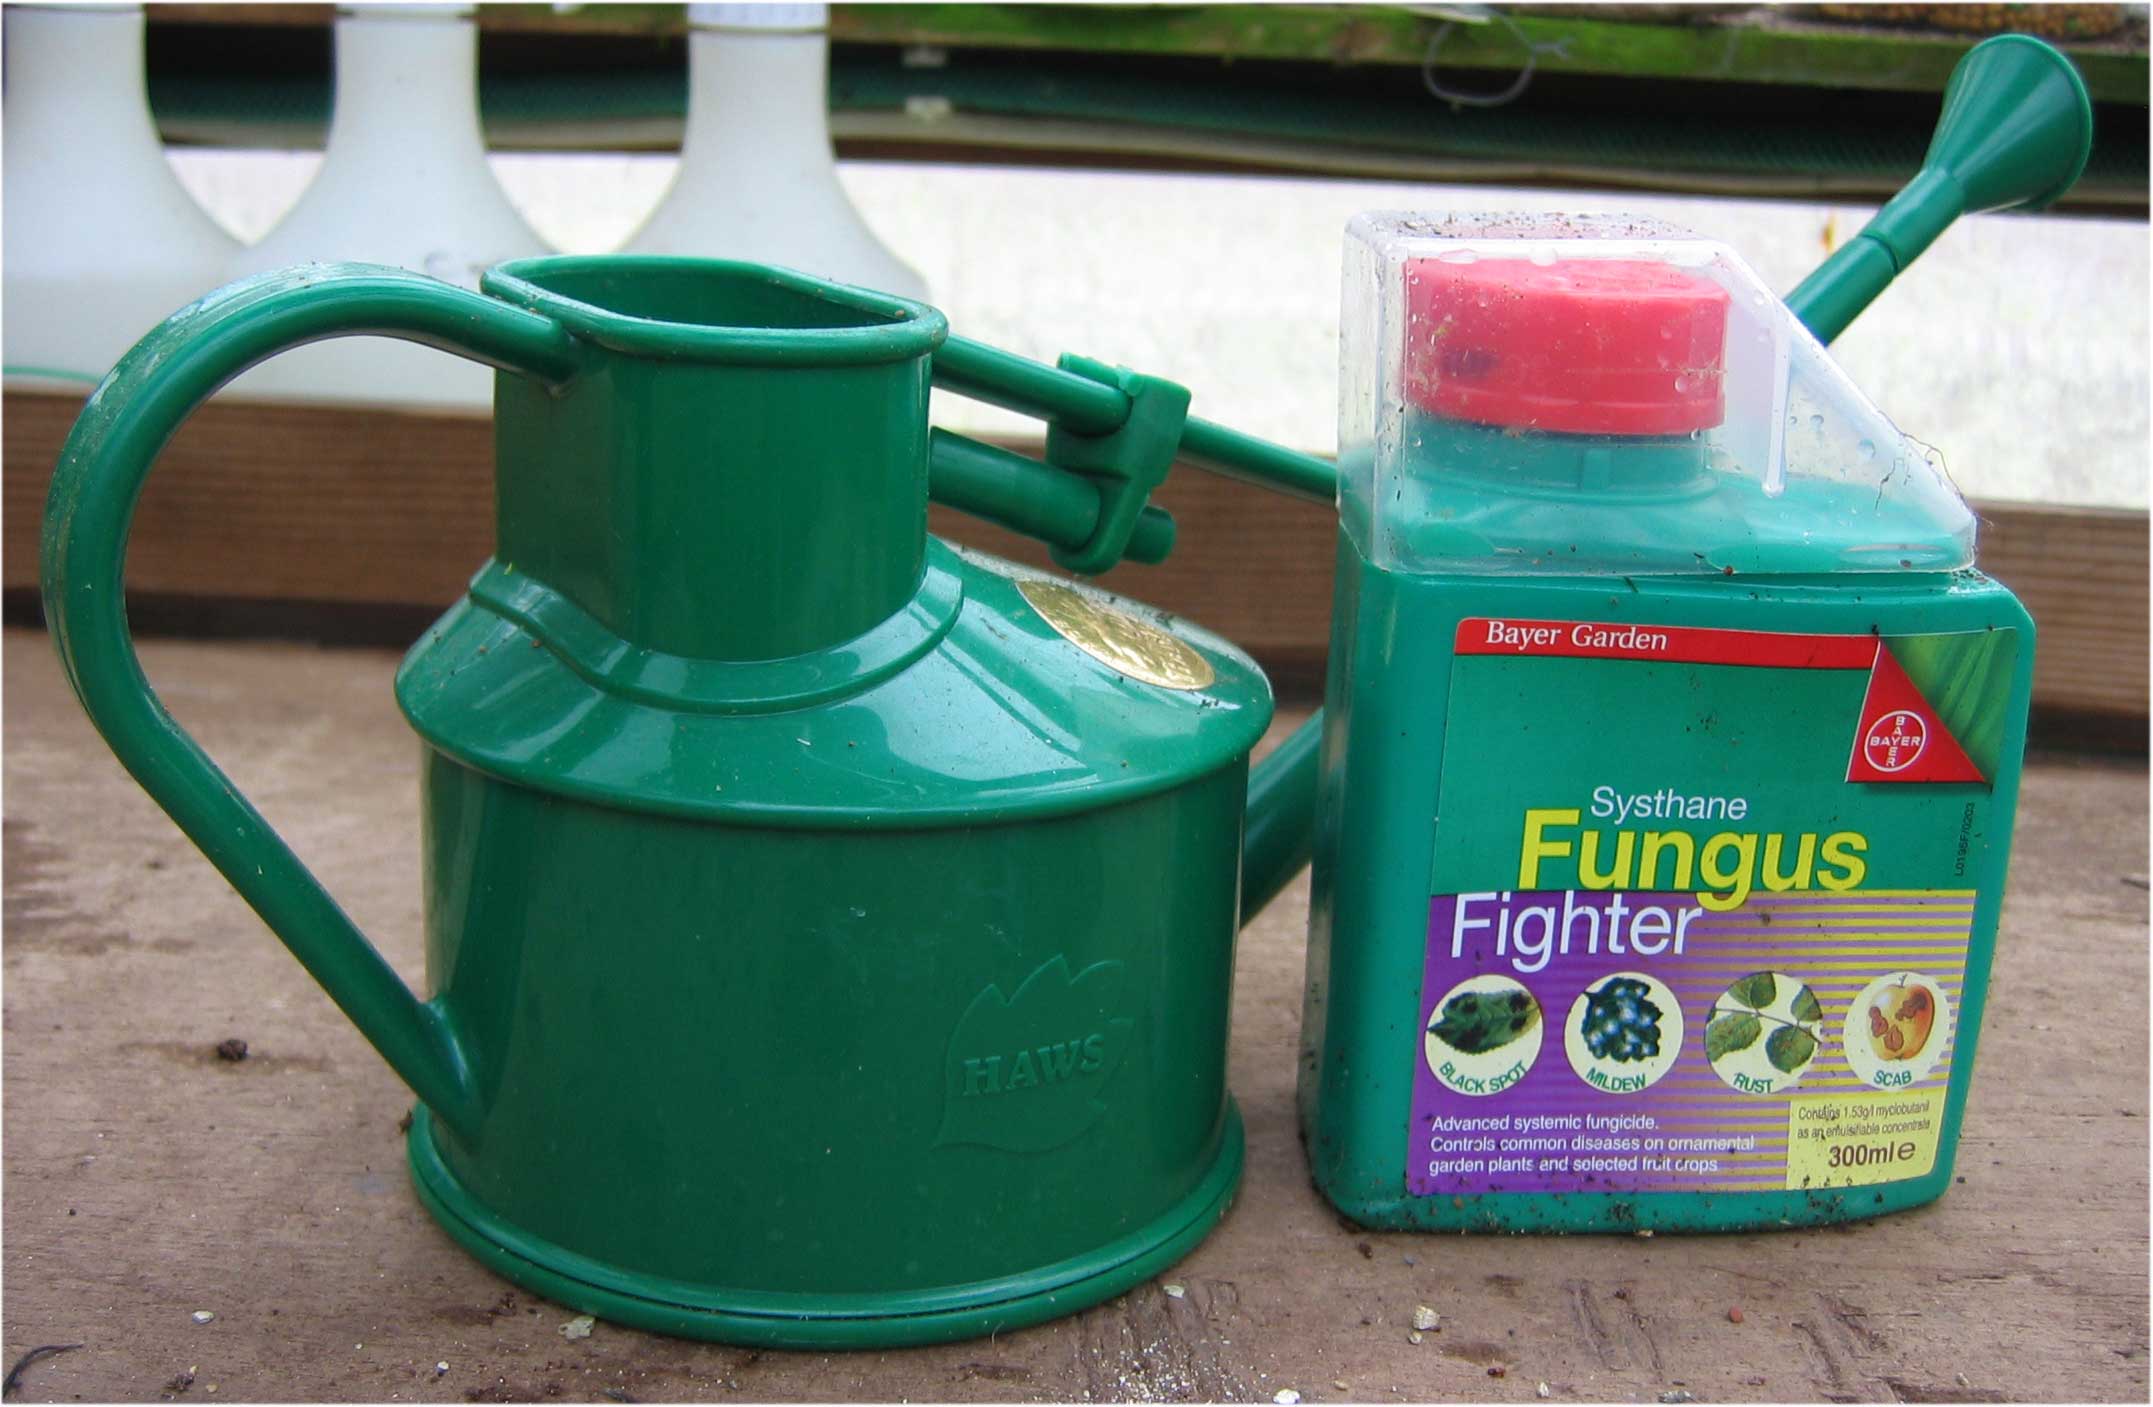
What I would recommend is watering cuttings in with a solution/suspension of fungicide as in the moist environment leaves, particularly those of softwood cuttings, can become infected with mildew and other fungi. I use Systhane appliedfrom a small watering can.
Using a fungicide may seem like a bad move as it's now recognised that Mycorrhizal symbiosis rather than the actual root system is mainly responsible for the uptake of nutrients in plants and I'm recommending killing off the fungi! However, I doubt if a cutting carries many Mycorrhizal spores and the answer is to treat the cutting at the potting up stage with a product such as Rootgrow which contains a range of Mycorrhizal species.
Making the cutting
This should be done with sharp tools to avoid ragged edges. I use well-sharpened secateurs for thick material or a scalpel for softwood.Types of cutting
Softwood
This is new material usually taken in late Spring/early Summer. It also includes totally soft material such as Violas, Lamium, etc.
Semi-ripe material
Current year's growth which has started to ripen. Taken in in late Summer/early Autumn.
Hardwood
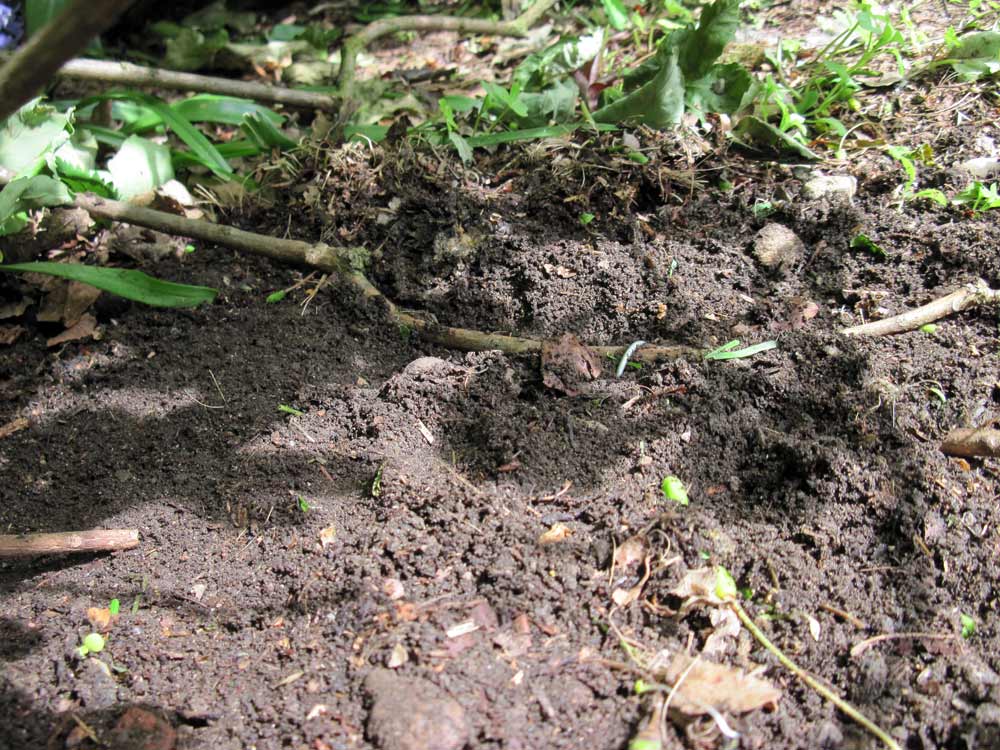
I also refer to these as 'Winter' cuttings as pieces of ripened wood are placed in the ground over Winter to root in the Spring.
I do this by putting a spade one spit into the earth, opening a slit, scattering some sharp sand in the bottom and burying the cuttings by treading the slit closed. The pieces should be preferably from the current year, about 0.25" thick and 6 - 12" long, and each one should have at least one bud below the ground and one above.
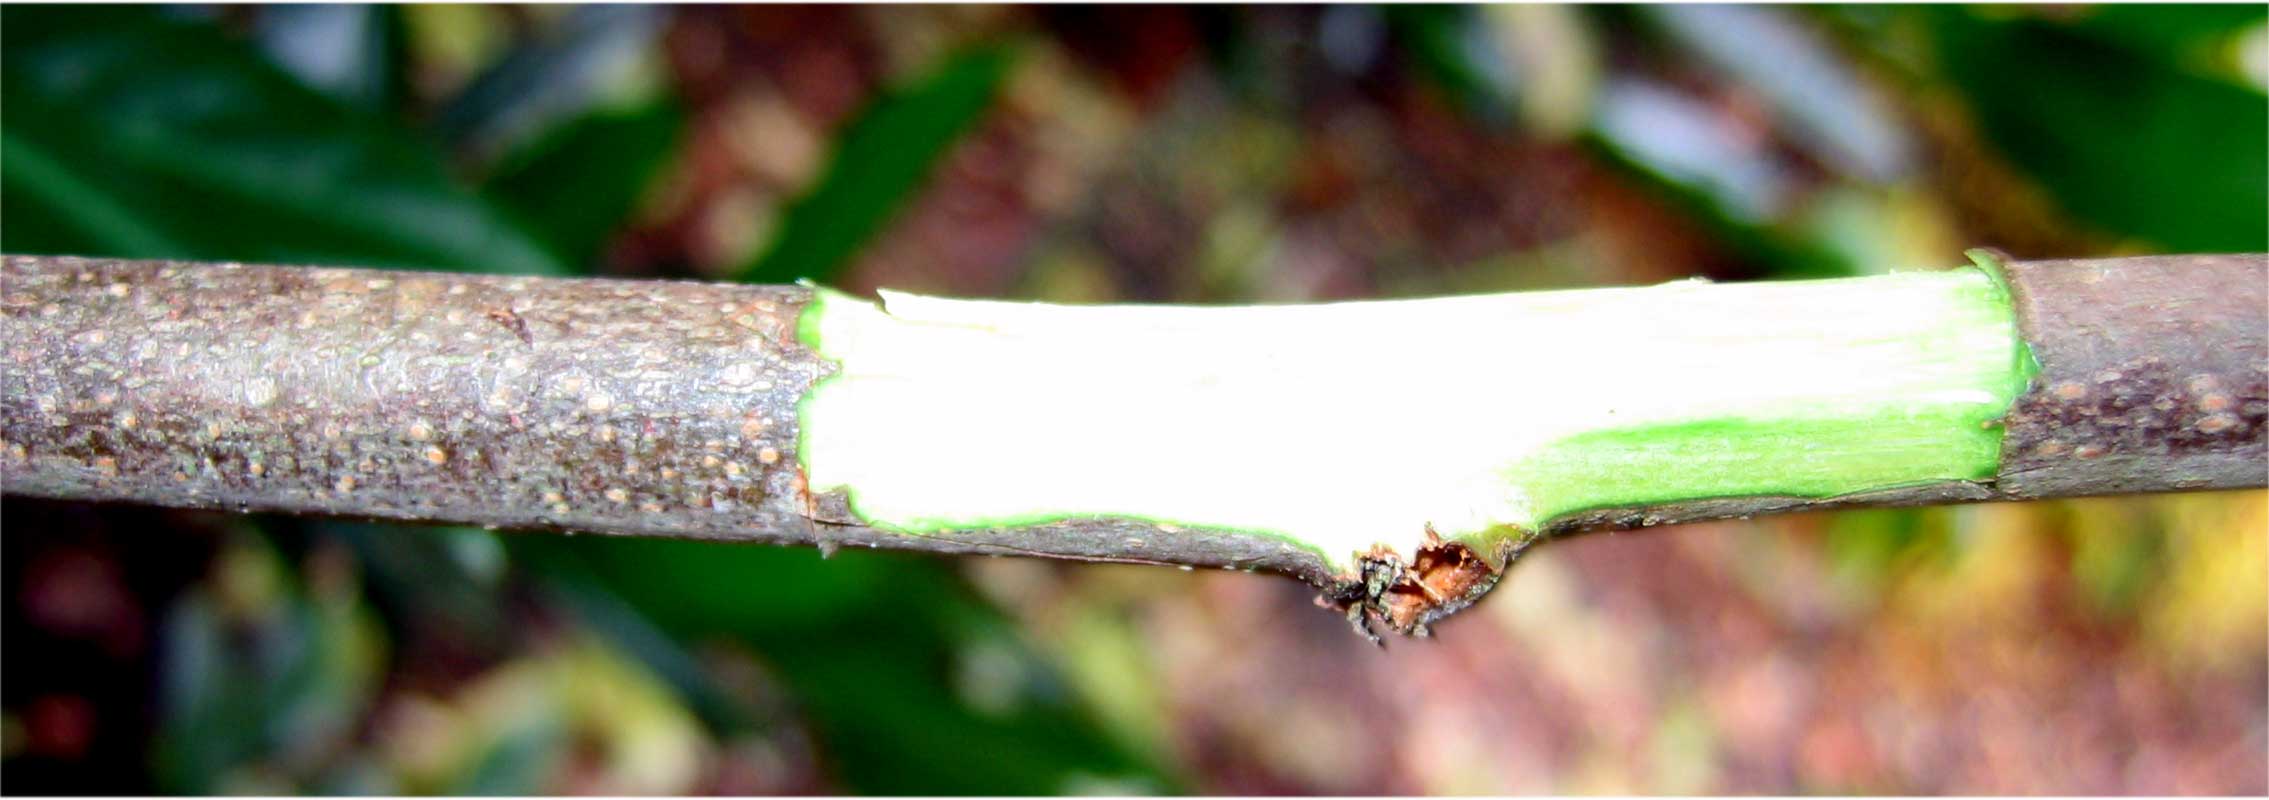
Heel cuttings
These are obtained by pulling/cutting a side-shoot off a stem so that a piece of the stem bark/wood is left attatched to the base of the cutting. The end of the heel needs to be trimmed with a knife. Heel cuttings can be taken from any of the above types of material but are usually taken from semi-ripe material.
It's thought that presence of the heel improves the chance of rooting because the growth area at the junction of shoot and stem has a higher concentration of growth hormones than the rest of the cutting, bar the apex.
Root cuttings
Many plants with fleshy roots can be propagated from root cuttings. The root is cut into sections 0.5 - 1.0" long, stuck into compost with the tops flush with the surface and then covered with vermiculite or fine gravel. This is particularly useful for the propagation of Oriental poppies. If, as is possible, you can't identify which is the top end of a piece of root, lay them flat on the surface of the compost until one end develops leaves.
It's also possible to consider the propagation of bulbs by chitting or from flakes as being part of the process of root cuttings. Even 'though a bulb isn't a root, the methods are very similar.
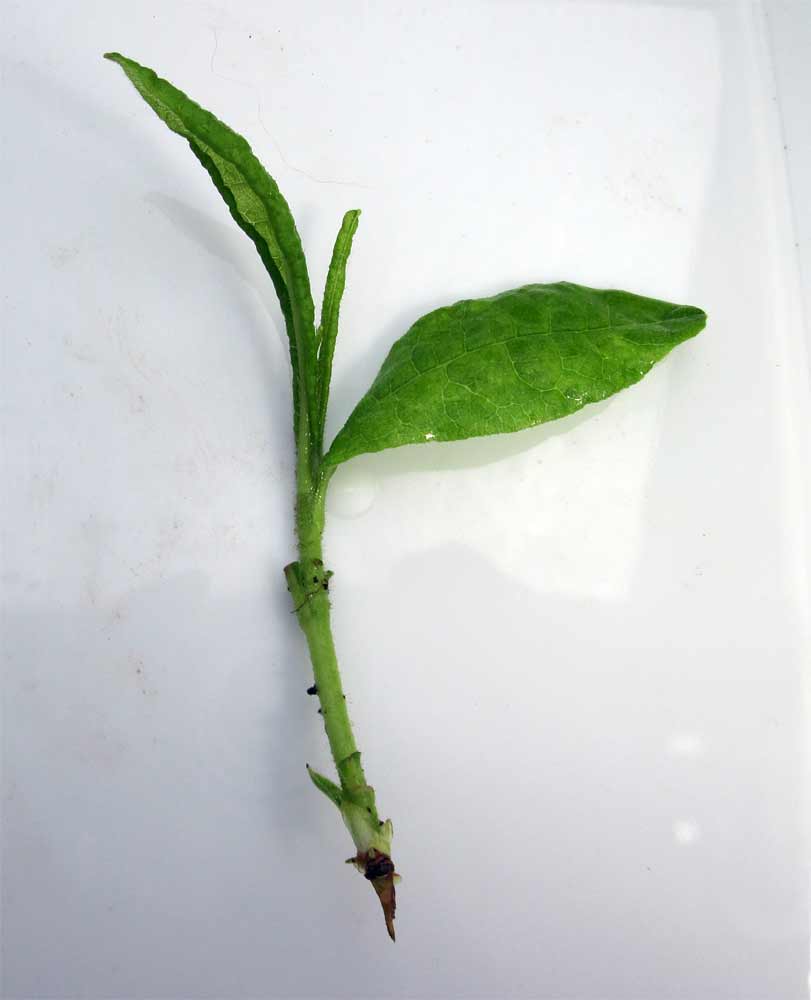
Leaf cuttings
Many succulents can be propagated by sticking a leaf into compost. This method is particularly useful for the propagation of Streptocarpus where a single leaf can be cut into several parts, each of which will root.
Simple Layering
Layering is essentially taking a cutting which hasn't been removed from the parent plant.
With simple layering, a twig or branch is merely pegged down in contact with the earth and left until roots appear. It does help if the bark is removed from the lower area but, as I'm sure you've seen, many plants will layer themselves.
Sinusoidal layering
This can be done with climbers such as Clematis or Jasmine. A strand of the plant is laid along the earth in a wave with each leaf node pegged down and buried until roots appear.

Air layering
This is applied to plants which don't have branches which can be bent to the ground.
Half of the bark is cut away where you want the roots to develop. A handful of damp sphagnum moss is wrapped around the area, covered in opaque polythene and securely bound on with adhesive tape. With luck roots will develop in 6 months - 1 year. Some books suggest that you cut half-way through the branch but I feel that this would most likely result in it breaking in any severe wind and the roots only form from the cambium layer in most cases. An air layered branch is quite liable to break in any case!
Some references state that the bark should be removed in a complete ring around the branch. This is what I curse deer and rabbits for doing! The ringed branch MIGHT develop roots before it dies but I've never risked it.
Water layering
This is my own terminology and results from a serendipitous arrangement of willow and pond.
Whilst most willows propagate very easily, one or two, S. fargesii and S. gracilistyla melanostachys in particular, are quite difficult. I have rooted them in the mister and via Winter cuttings but the best results for gracilastyla came when branches which had dipped into our wildlife pond for some weeks were found to be well rooted when I cut them back.
Compost
I used to make a special rooting compost which was high in sharp sand but now I use the same compost for all purposes: a mixture of two parts of reconstituted coir to one of sharp sand. This also has a small amount of trace element frit added but this isn't needed for cuttings. This does for everything except those few species which I root in just sharp sand.
Potting up
One is often advised to wait until the roots are visible through the bottom of the pot/tray before cuttings are potted up. The rooting times I give are NOT for this stage of growth but are the time for a viable root system to develop. I knock out a pot of cuttings to check on the roots, pot up those which are ready and replace the others. There is a risk of damaging partially formed roots but you don't loose many. This would be the stage at which a Mycorrhizal product would be used.
Potting on
I pot on when roots come through the bottom of the pot. i.e. before the plant is pot bound. At this stage I add fertilizer in the form of slow release pellets, (Osmocote).
Hygiene
Many references stress the need for good operational hygiene:-
I tried some of this; often forgot to do it or couldn't be bothered and have found few problems. Some cuttings may 'damp off' but the risk of this is reduced if you water-in with a fungicide.
Hygiene is important if you're a commercial grower where any vigorous pathogen might go right through your stock but I don't think it's too important for amateurs. Do it if you've the time.
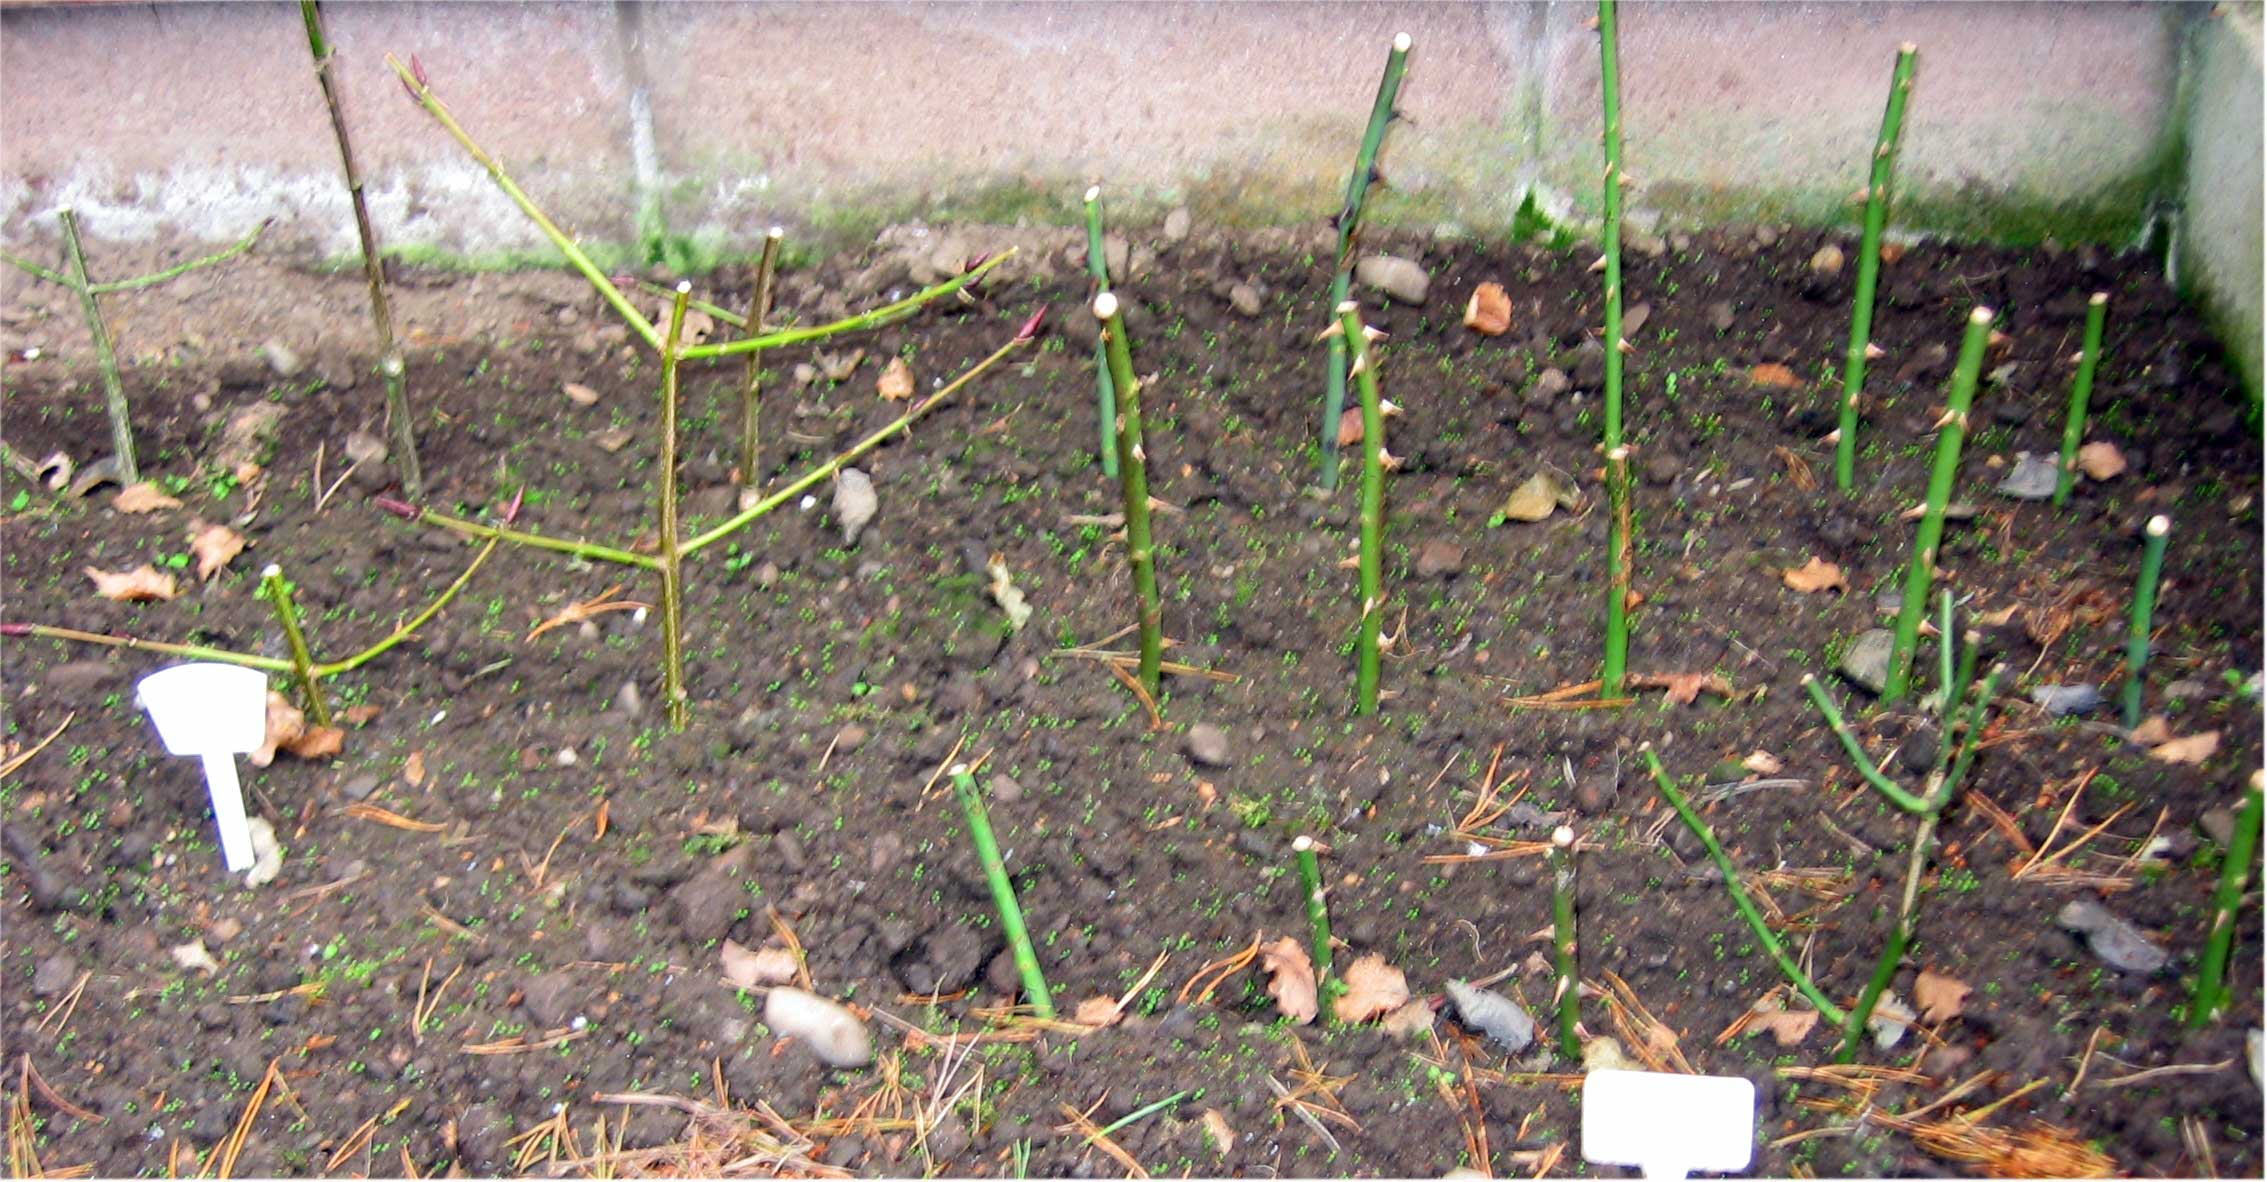
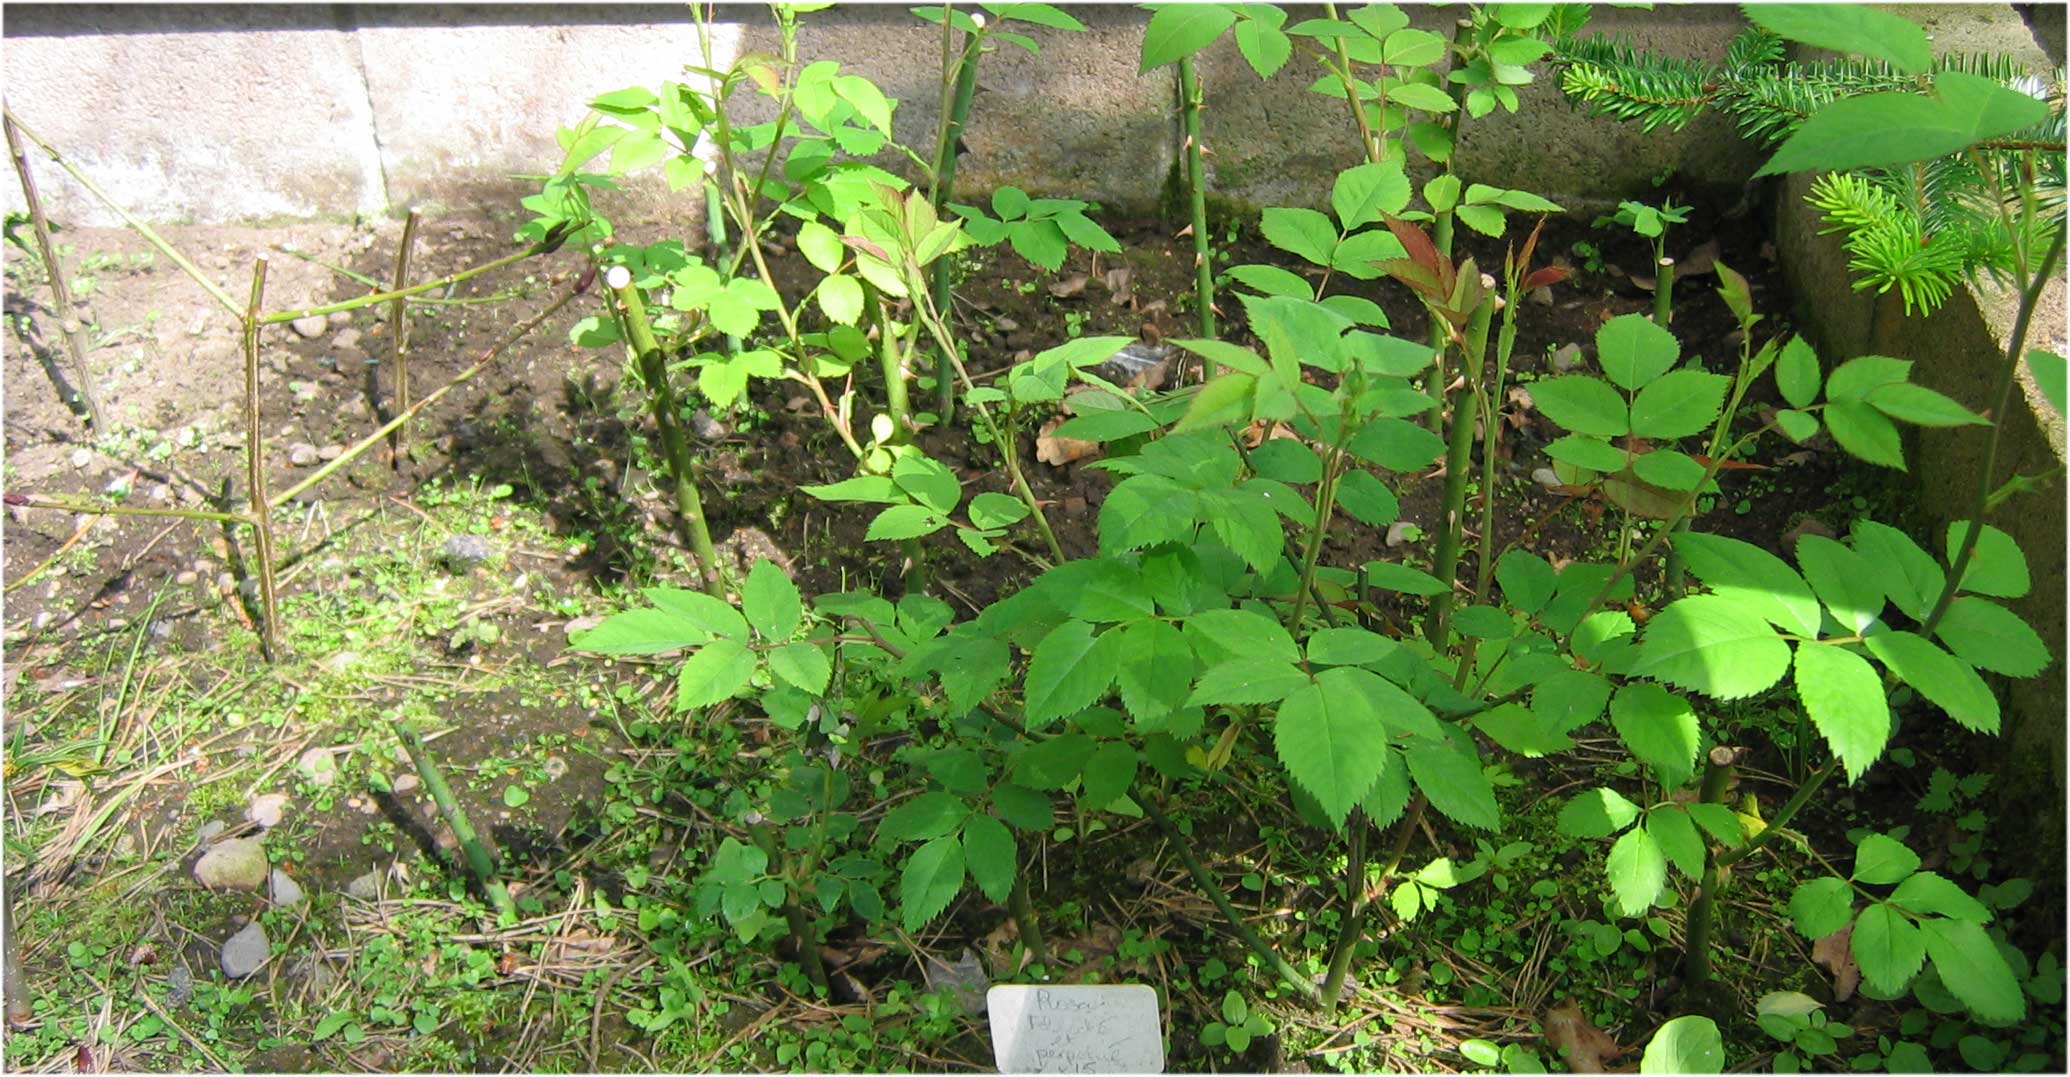
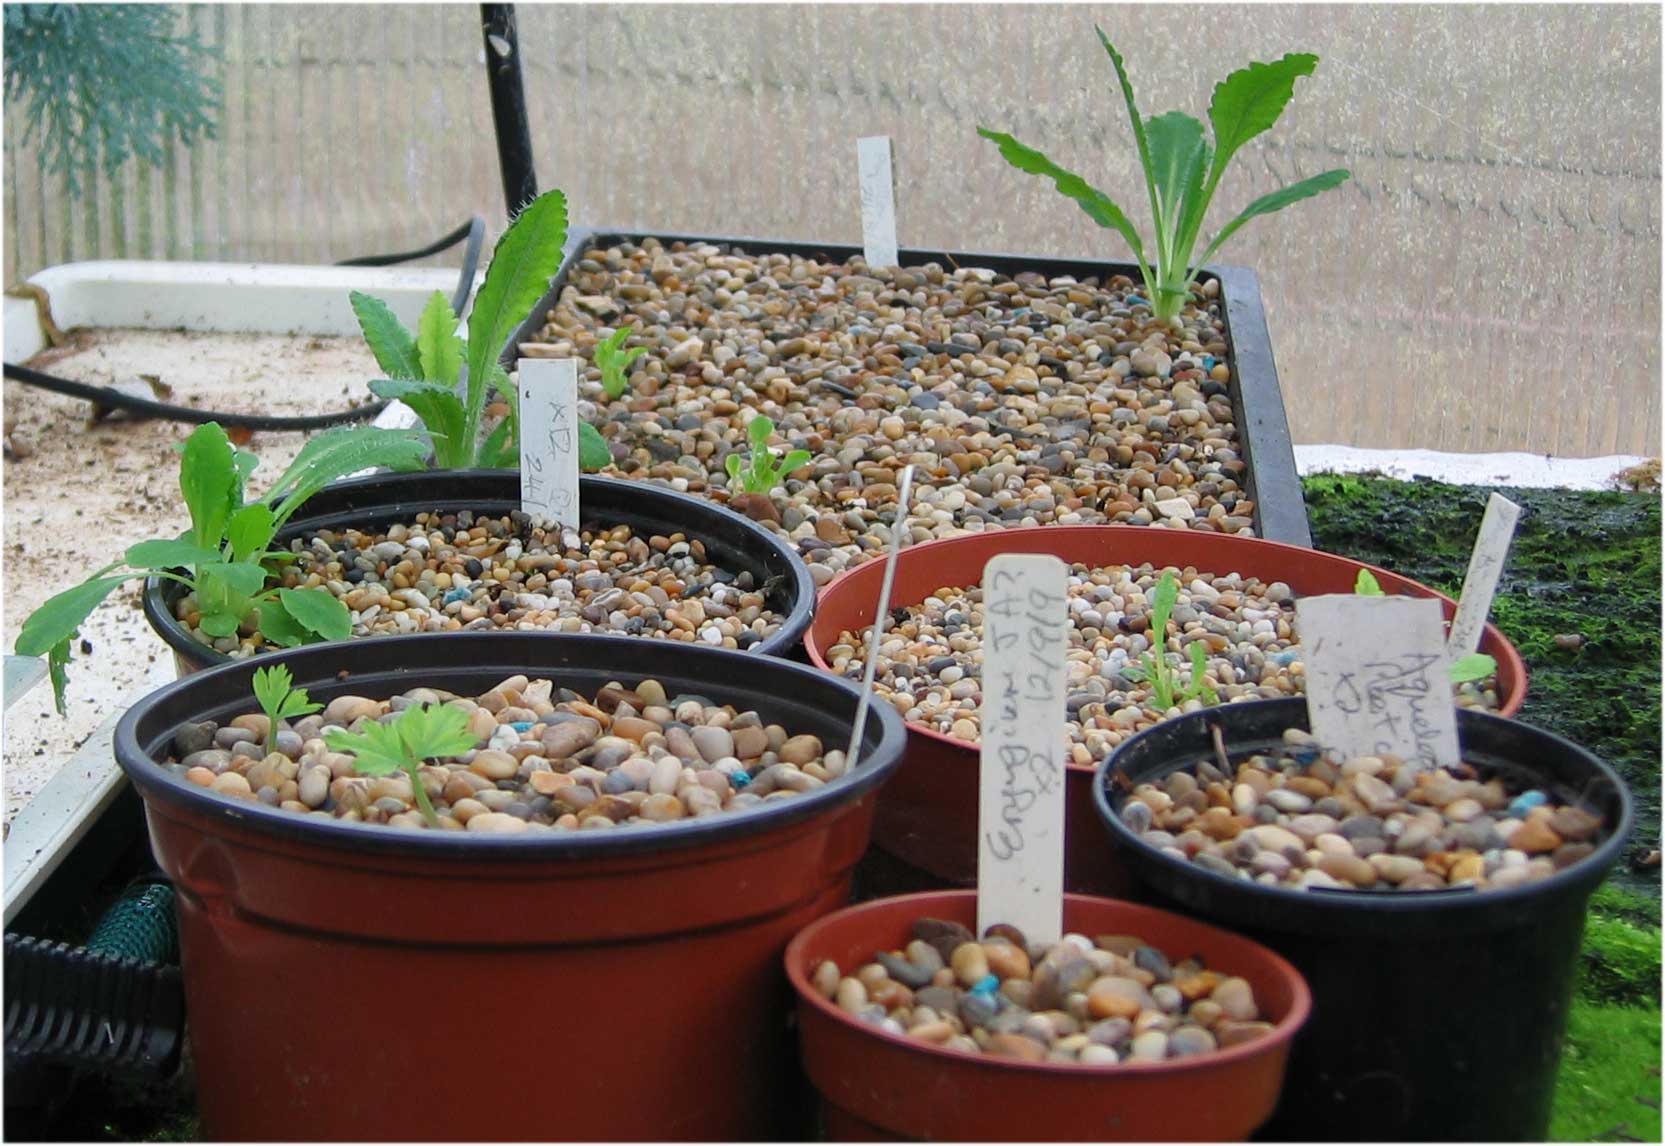
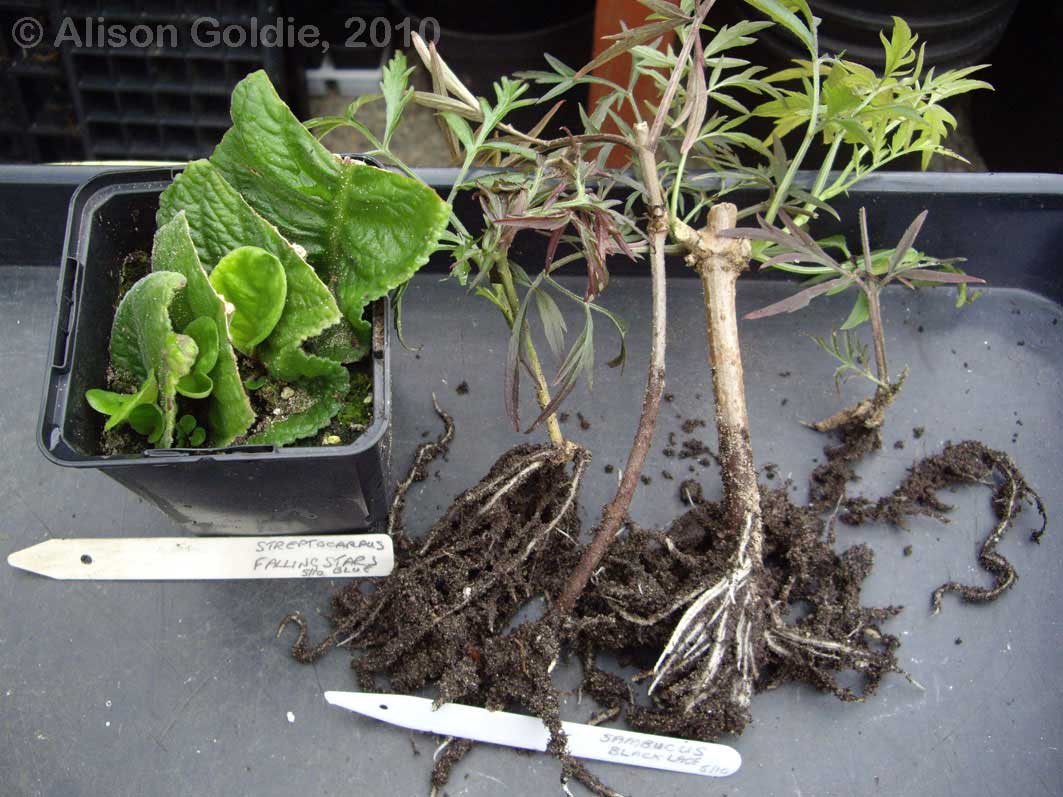
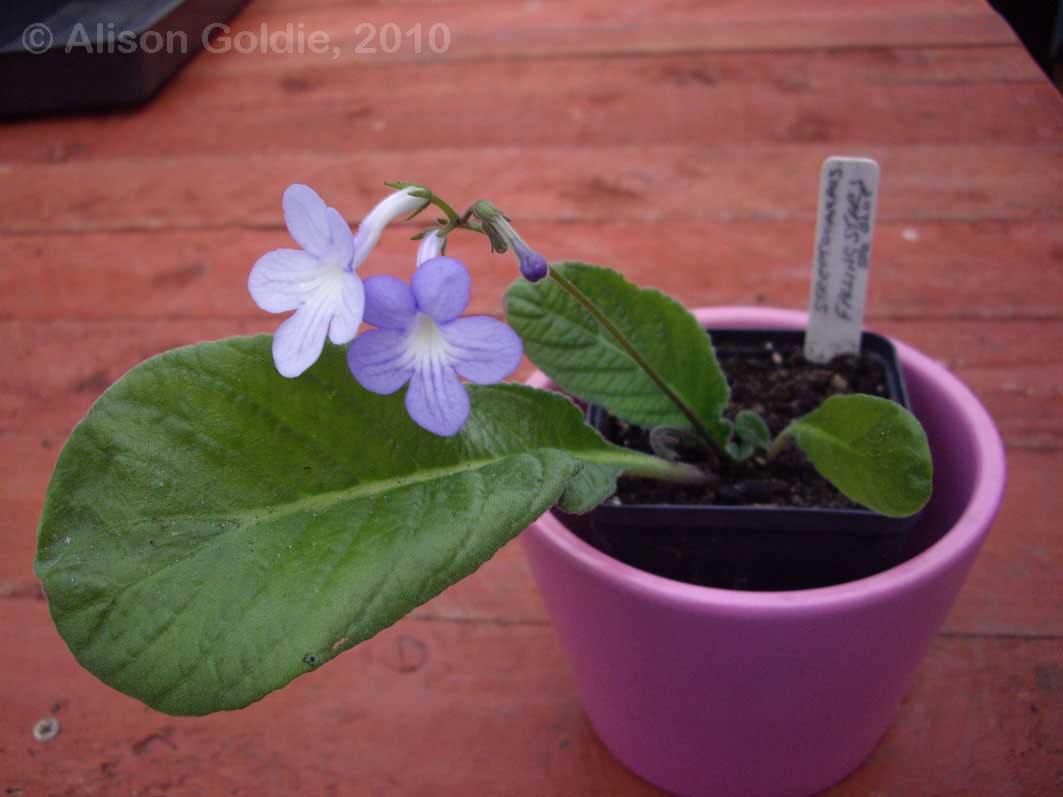
Update November 2010The picture on the left is of the material provided at the workshop. It shows the degree of development after two months. The photo on the right shows one of the leaf cuttings flowering in November.
A list of plants, rooting methods, time to root and aproximate success rate can be seen here.
